Two Penguin Chicks – Mo’s Digital Pencil

HEY FRIENDS! So here’s a news flash! I’ve been looking through my craft supplies and have started destashing some of my older stamps. I’m a one and done kind of crafter – I rarely color the same image twice so I have lots of stamps that I’ve colored once and will probably never use again. I’m short on space so I have to stick to being a active crafter rather than a collector of craft supplies. So I have an ever growning album with my available stamps over in the Facebook group “De-stash to Re-stash” (you need to be logged into Facebook for the link to work). Go take a look if you’re interested! Lots of good deals on stamps you know and love!

So today, I’m featuring the Two Penguin Chicks (merged) digital stamp from Mo’s Digital Pencil. In the meantime, I’ve been working through my stash of digital stamp, particularly those from Mo’s Digital Pencil. I like working with digital images because I’m really short on physical storage space and digital stamps are easy to store on my computer. This particular stamp includes separate images of two chicks, though obviously I’m only featuring one of them here.

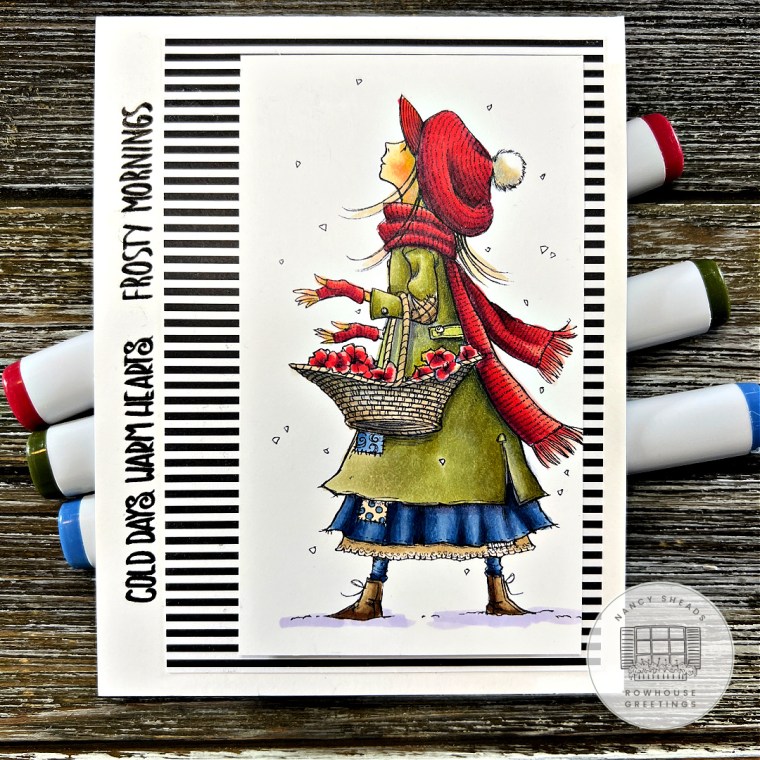
I wanted to keep the card design fairly simply. To be honest, I just wanted to color and not worry about design so as you’ll see, I stuck to one of my tried and true layouts. And as always, I’ve linked supplies with compensated affiliate links used where possible at no cost to you.

Rowhouse Greetings | Two Penguin Chicks by Mo's Digital Pencil

TWO PENGUIN CHICKS
SIZE
: A2
Featured Products:

The image was printed on Hammermill cardstock. If you’re hesitant to use digital stamps, check out my video over on my YouTube channel showing how I print digital stamps for Power Poppy. The image was colored with Copic markers (see list below). After I finished coloring the image, I used Versafine Ink to stamp a sentiment from the Christmas Sentiments stamp set. I trimmed the panel with the second largest die in the Chunky A2 Scalloped Rectanges die set and backed it with craft foam for dimension. Next, I cut a piece of design paper to 4.25″ x 5.5″ and glued it to the front of an A2 cardbase. I finished by assembling the layers as shown.

That’s all for me today! See you again soon!

Rowhouse Greetings | Nancy Sheads

Supplies

COPICS: BV00, W0, W1, W3, W5, W7 (penguin); YR04, YR09 (beak, feet); R29, R39, R89 (scarf & hat); W0, W1 (shadow)

Rowhouse Greetings | Two Penguin Chicks by Mo's Digital Pencil | Color Map

[Compensated affiliate links used when possible. In addition, as an Amazon Associate I earn from qualifying purchases. Items marked with an asterisk (*) were provided by a store or the manufacturer. All other items were personally purchased.]


Snowflakes by Mo’s Digital Pencil

HEY FRIENDS! Got something a little different today! My friend Jill Killeen of Killeen House Studio asked me to participate in a monthly challenge with her where we would color the same image and see how we each interpreted it. So this month we’re starting off with a digital image from Mo’s Digital Pencil. As always, I’ve linked supplies with compensated affiliate links used where possible at no cost to you.

This month we’re coloring Snowflakes by Mo’s Digital Pencil and here’s my take on the image!

Rowhouse Greetings | Snowflakes by Mo's Digital Pencil

SNOWFLAKES
SIZE: A2
Featured Products

I printed the image on Hammermill Smooth Cardstock and colored it with Copic markers (see marker list below). If you’re unfamiliar with digital images, here is a video I did for Power Poppy illustrating how I print digital images.

Once the image was colored, I trimmed the panel to 2-3/4 x 4-3/4 inches as well as a piece of design paper from the Black & White Striped 6×6 Paper Pad by My Favorite Things cut to 3-1/2 x 5-1/8 inches. I love this paper pad and use it a lot since it seems to just go with everything. I applied craft foam to the back of the image panel, but you could use foam tape for dimension. The layers were assembled as shown above. I stamped two of the sentiments from the Christmas Sentiments by Penny Black using Versafine ink along the left side to finish off the card.

Jill’s Card

Killeen House Studio | Snowflakes by Mo's Digital Pencil

A lot of similarities in our coloring (I was one of her Copic instructors!) and we picked similar color palettes. This image just cries out for a vintage color scheme and the music design paper is a lovely touch. Check out her blog post describing her card and give her post some love!

Now if you want to play along – don’t panic because we used a digital image. Jill and I live in different states now so it’s just easier to use digital images. This particular image is also available from Penny Black so you can stamp it if you prefer. And if you do, tag your Instagram post with the hashtag #nancyandjillcolortogether so we can see it!

That’s all for today! See you again soon!

Rowhouse Greetings | Nancy Sheads

Supplies

COPICS: BV00, Y26, E50, E51, E93 (skin); E42 (hair); R32, R35, R37, R39, BV20, BV23 (hat, scarf & gloves); C1, C3, C5, YG91, YG93, YG95 (coat); B93, B95, B97, B99 (dress); E42 (underskirt); E42, E43, E44 (shoes); BV23, R32, R35 (flowers); BV00 (shadow)

[Compensated affiliate links used when possible. In addition, as an Amazon Associate I earn from qualifying purchases. Items marked with an asterisk (*) were provided by a store or the manufacturer. All other items were personally purchased.]

Valerie in Autumn by Mo’s Digital Pencil (VIDEO)

MORNING EVERYONE! I’m back today with another card and a new Copic coloring video. I decided to take a break from holiday cards to color up a fall image from my stash – Valerie in Autumn by Mo’s Digital Pencil. I’m a guest designer this month over on the Mo’s Digital Pencil Challenge blog and decided to feature this card for my design team project. I’ve linked the supplies for today’s project with compensated affiliate links used where possible at no cost to you.

Today’s project features:

  • Valerie in Autumn Digital Stamp by Mo’s Digital Pencil
  • Copic coloring (see marker list and video below)
  • Additional basic supplies linked in thumbnails below
Rowhouse Greetings | Valerie in Autumn by Mo's Digital Pencil

VIDEO – VALERIE IN AUTUMN

Watch below or in HD on YouTube.

STEP BY STEP INSTRUCTIONS

That’s it for me today! I hope you enjoyed today’s project and video. Leave me a note in the comments below if you have any ideas for future videos. If you liked today’s video, I’d be delighted if you’d give it a thumbs up and subscribe. If you would like to be notified when the next video is available, don’t forget to hit the bell next to the subscribe button.

See you next time!

Rowhouse Greetings | Nancy Sheads

SUPPLIES

COPICS: E000, E00, E11, E21, E93, V20 (skin); B34, C1, C3, C5 (hair); B91, B93, B95, B97 (jacket); BG11, BG15, BG32, R24 (dress); C1, C3, C5, BG32 (tights); C1, C3, C5, B91 (boots); R24, YR04, Y35 (leaves); BG0000, BG10, B0000, 0 Various Ink (background); BV23 (shadows)

Below I’ve listed the products used for today’s project. Compensated affiliate links used at no cost to you (see disclosure). I pay out of pocket for the majority of the products — papers, inks, dies, embellishments, etc. —  that you see in my projects with the exception of the handful of products that I receive for design team work or guest posts. I only use products that I love. If you like my projects, please consider supporting me by clicking through these links when you shop. Thanks so much!

Got the Wreath by Mo’s Digital Pencil

GOOD MORNING FRIENDS! I have a confession – I love making Christmas cards. I first got interested in cardmaking a few years ago because I wanted to make the holiday cards for that year. What I learned from that experience is that I need to start making cards much earlier than I did that year so that I’m not in a mad rush in December. I can’t say that I always following through on that lesson, but at least this year I have a growing stash of cards to send out.

So I’m back today with yet another holiday card featuring a digital stamp from Mo’s Digital Pencil. I’ve linked the supplies for today’s project with compensated affiliate links used where possible at no cost to you.

Today’s project features:

Rowhouse Greetings | Got the Wreath by Mo's Digital Pencil

Step by Step for Got the Wreath by Mo’s Digital Pencil

  • Print image on white Copic friendly cardstock and color with Copic markers. Marker list is shown below.
  • Trim image to 3.5″ x 3.5″
  • Adhere a piece of craft foam cut to size to the back of the image and set aside.
  • Stamp sentiments on white cardstock with a detailed black ink. Cut sentiments strips apart with coordinating die. Apply foam stripes or squares to the back and set aside.
  • Trim patterned paper to 3.75″ x 4.5″
  • Trim a piece of white cardstock 3 7/8″ x 4 5/8″
  • Adhere pattern paper to center of white cardstock as shown.
  • Adhere image to design paper approximately 1/8″ from the top of the design paper as shown.
  • Adhere sentiment to design paper as shown.
  • Cut blue cardstock to A2 size.
  • Adhere top layers to blue card stock with a strong adhesive as shown.
  • Adhere card front to card base with a strong adhesive.
Rowhouse Greetings | Got the Wreath by Mo's Digital Pencil

That’s all for me today! See you soon!

Rowhouse Greetings | Nancy Sheads

Supplies

COPICS: BV0000, BV000, BV00, B91, B93, B95, B97, B99 (hat); B91, B93, B95. B97, B99 (jacket); BV20, BV23, BV25 (pants); BV20, BV23, B91, B93, B95 (shoes); R24, R35, R37, R39, R89 (ribbon); YG03, YG17, YG67, YG99 (wreath); R24, R39 (berries); BV000, BG000, B000 (snow & background)

Below I’ve listed the products used for today’s project. Compensated affiliate links used at no cost to you (see disclosure). I pay out of pocket for the majority of the products — papers, inks, dies, embellishments, etc. —  that you see in my projects with the exception of the handful of products that I receive for design team work or guest posts. I only use products that I love. If you like my projects, please consider supporting me by clicking through these links when you shop. Thanks so much!

With Tree by Mo’s Digital Pencil

GOOD MORNING FRIENDS! Just a quick post today because I have a day full of tasks and errands to check off my to-do list. But I just wanted to show you a card I made recently featuring With Tree by Mo’s Digital Pencil. It’s one of the free images that I received for being a patron on Mo Manning’s Patreon Page. I’ve linked the supplies for today’s project with compensated affiliate links used where possible at no cost to you.

Today’s project features:

  • With Tree Digital Stamp by Mo’s Digital Pencil (available only to Mo’s patrons on Patreon.com)
  • Pine Forest Stencil by My Favorite Things
  • Copic coloring (see list below)
  • Additional basic supplies linked in thumbnails below
Rowhouse Greetings | With Tree by Mo's Digital Pencil

Step by Step for With Tree by Mo’s Digital Pencil

Rowhouse Greetings | With Tree by Mo's Digital Pencil

That’s it from me today! See you soon!

Nancy Sheads

Supplies

COPICS: E000, E00 E04, E21 (skin); RV55, RV63, RV66, R89 (scarf, hat & boots); BG11, BG32, BG15 (jacket); BV000, B000, BG10 (snow and background)

Below I’ve listed the products used for today’s project. Compensated affiliate links used at no cost to you (see disclosure). I pay out of pocket for the majority of the products — papers, inks, dies, embellishments, etc. —  that you see in my projects with the exception of the handful of products that I receive for design team work or guest posts. I only use products that I love. If you like my projects, please consider supporting me by clicking through these links when you shop. Thanks so much!