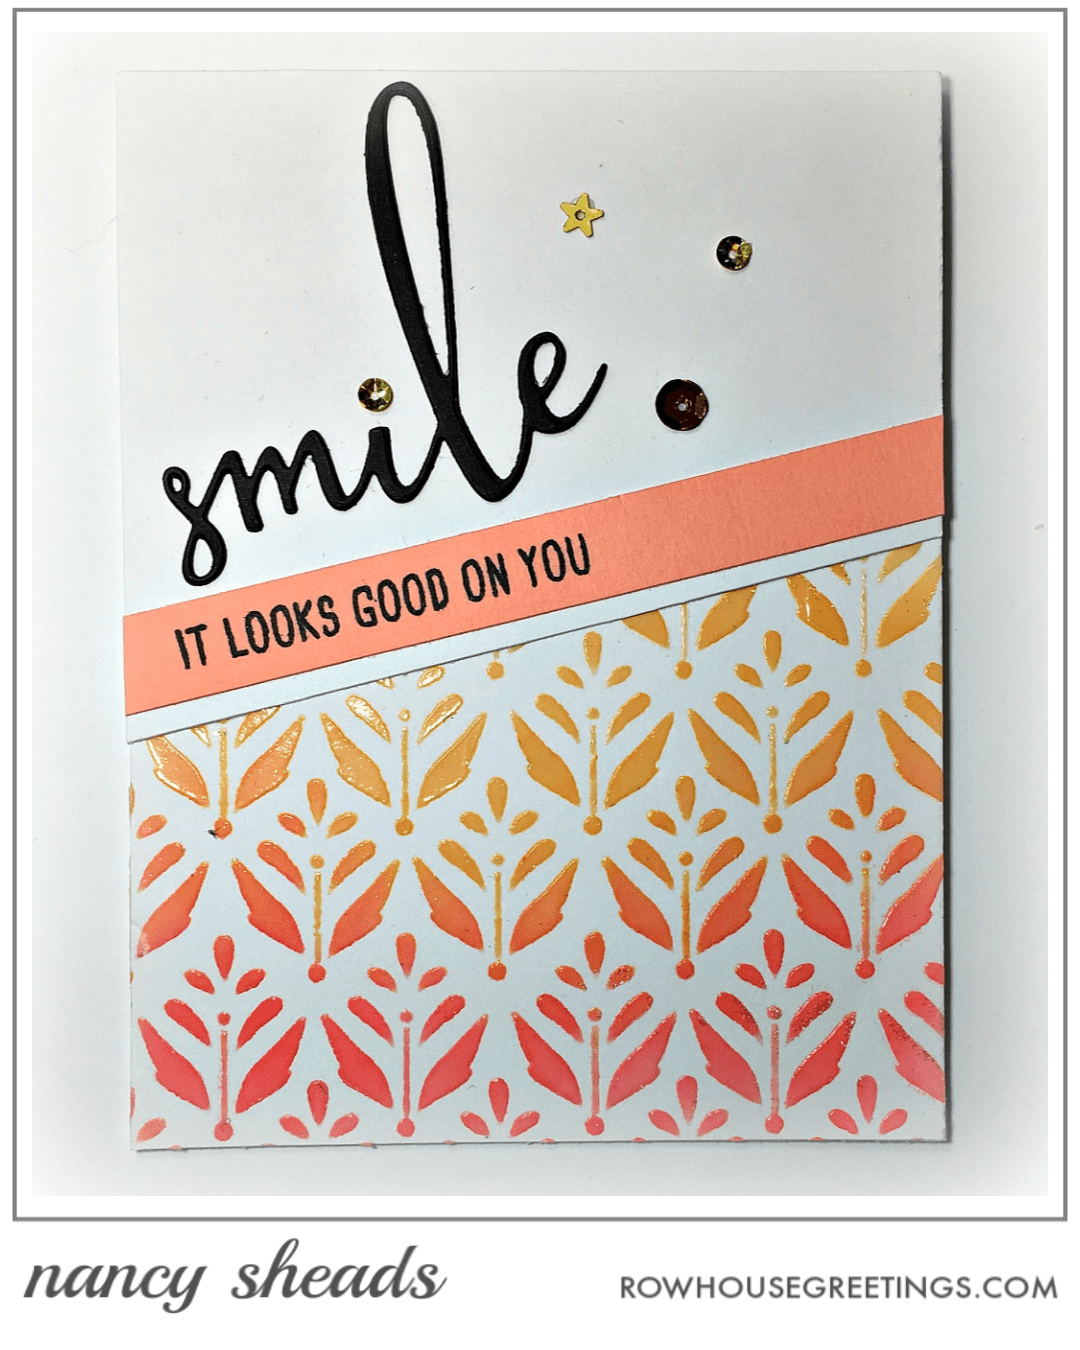
Join me for this amazing new class where you will be using stencils and learning how to foil with their designs. Each student will make four cards and receive their own Holiday Foliage Stencil by Newton’s Nook. CLASS FEE $34
Photo Scraps 1213 Liberty Road | Eldersburg, MD 21784 phone: 410-549-5187 | web: http://photoscrapsblog.blogspot.com/ Thursday, December 5, 2019 – 1:00 PM to 3:00 PM Sunday, December 8, 2019 – 1:00 PM to 3:00 PM Saturday, January 4, 2020 – 1:00 PM to 3:00 PM Please call Photo Scraps at 410-549-5187 to register.
Bring to Class
One Ranger Ink Blending Tool (handle and foam applicator)
Nuvo Glitter Drops in White Blizzard
Pixie Spray
Purple iCraft Tape
Glass media mat or craft mat (if you already have)
Palette knife
One sandwich size plastic container (such as a Glad Food Storage Container)
Paper towels
Baby wipes
Scissors
Foam Squares (such as Gina K. Designs Foam Squares or Scrapbook Adhesives 3-D Squares)
Tape runner
Liquid glue that dries clear (such as Connect Glue by Gina K. Designs or Ranger Multi Medium Matte)
Join me for a new Copic markers class focusing on techniques for coloring drop folds in clothing. In this class, you will make two cards featuring stamps from Stamping Bella with emphasis on basic Copic techniques. All necessary techniques are taught in class. Seats are limited, so sign up today! CLASS FEE $25
The Queen’s Ink Savage Mill Box 2048 | 8600 Foundry Street | Savage, Maryland 20763 phone: (301) 497-9449 | website: https://queensink.com Tuesday, August 27, 2019, 1:00 PM – 3:00 PM Register online or call the Queen’s Ink at (301) 497-9449
Copic Markers to Bring to Class
BRING TO CLASS: The list below reflects the Copic markers that I will use in class. You can follow along using the same colors OR substitute colors based upon your personal Copic collection. Please make sure your Copics are marked with Washi tape or some other means of identification. Markers are available for purchase at The Queen’s Ink. Students will receive a 10% discount on Copic markers. I will be available prior to class to help with selection.
PLEASE NOTE: You must bring your own markers to participate in class. If you need markers, please contact The Queen’s Ink in advance of class. If you wait until class time, you may not be able to purchase the markers you need.
BV00: Mauve Shadow
V12: Pale Lilac
V15: Mallow
V17: Amethyst
Y18: Lightning Yellow
YR15: Pumpkin Yellow
YR18: Sanguine
BG10: Cool Shadow
BG11: Moon White
BG53: Ice Mint
BG57: Jasper
E000: Pale Fruit Pink
E01: Pink Flamingo
E11: Barley Beige
E19: Redwood
E49: Dark Bark
E50: Egg Shell
E53: Raw Silk
E57: Light Walnut
C3: Cool Gray No. 3
C5: Cool Gray No. 5
C7: Cool Gray No. 7
NOTES
You can substitute BG23 and BG15 in place of BG53 and BG57
If you have a favorite hair color combination, you can substitute it in place of E49, E50, E53, and E57.
GOOD MORNING FRIENDS! I’m back today with another card that is the result of some late night experimentation. As you’ve probably noticed, I love incorporating stencils into my cards and I’ve amassed quite a collection. I’m always looking for new and different ways to use them. Like many crafters, I’ve also accumulated a variety of different mediums that I often play around with (also with varying results!).
When I decide to try expanding my coloring beyond Copics, I purchased a set of Prismacolor pencils, but found that I didn’t really enjoy using them. But recently I decided to give it one more try – not with Prismas – but with Farber-Castell Polychromos colored pencils. Although I do suffer from full set syndrome, I did manage to control myself and purchased a set of 36 pencils, which I thought would have enough variety to in color to experiment.
I selected the Peacock Mandala stencil from Picket Fence Studios and taped it in place with iCraft Purple tape to a piece of Stonehenge White paper. I wanted the mandala to be bright and colorful, so I selected a several pencils in blues, greens and yellows. Then I just colored the open areas of the stencil. Polychromos pencils are oil based and seem to soak into the paper. I found them much easier to use than Prismas and did not need to use Gamasol to blend.
Once the coloring was complete, I removed the stencil and applied the dot pattern with Nuvo Crystal Drops in Ebony Black. I really have to thank Wendy Vecchi for showing me in a recent class how to apply enamel drop products with a stylus for a quick, easy, and consistent application.
To finish, I added a die cut from Honey Bee Stamps that I popped up with foam squares. I really love how this card turned out and I’m sure I’ll keep this technique in mind when I’m using my stencils.
Disclosure: Below are the supplies I’ve used for today’s project. All items were personally purchased except those marked with an asterisk (*) which were provided by a store or design team. I never share a product I do not like. All opinions are my own. Read more.
Where available I use compensated affiliate links, meaning that at no cost to you I receive a commission if you click through and make a purchase. I use this money to support my blog. If you like my projects, please consider supporting me by clicking through these links when you shop. Thanks so much! Read more.
Supplies
Paper: Neenah Solar White 110# (card base); Stonehenge White by Legion (coloring layer) Stencil: Peacock Mandala by Picket Fence Studios Dies: Bloom by Honey Bee Stamps Embellishments: Nuvo Crystal Drops in Ebony Black by Tonic Studios Polychromos: (order from center to edge) Hellioblue-Redish #151; Ultramarine #120; Light Ultramarine #120; Colbalt Turquoise #153; Colbalt Green #156; Emerald Green #163; Leaf Green #122, Light Green #171; Dark Naples Ochre #184; Cadmium Yellow #107; Cadmium Orange #111
GOOD MORNING FRIENDS! I’ve done a lot of craft shopping lately and my house is a wreck with piles of new stamps, stencils and other products waiting to be organized and put away. I’ve also been putting some thought into future classes so I have stuff piled up all over the dining room table. But yesterday, I pushed all that stuff to the side to make a just for fun card to start the inevitable stash of holiday cards.
Today’s card features a digital image from Mo’s Digital Pencil called Maggie with a Penguin. This image was at one time also available in rubber from Stamping Bella, but I think it has since been retired. You can still find the rubber stamp in a few online craft stores as well as Amazon.
For the background, I used the Holiday Knit Layering Stencil by Tim Holtz with Dreamweaver Embossing Paste. The image was printed onto Hammermill Color Copy Digital Cover and colored with Copic markers (see list below). I added a sentiment from Christmas Sentiments by Penny Black stamped in Versafine ink.
One holiday card down. Don’t want to think about how many to go!
Disclosure: Below are the supplies I’ve used for today’s project. All items were personally purchased except those marked with an asterisk (*) which were provided by a store or design team. I never share a product I do not like. All opinions are my own. Read more.
Where available I use compensated affiliate links, meaning that at no cost to you I receive a commission if you click through and make a purchase. I use this money to support my blog. If you like my projects, please consider supporting me by clicking through these links when you shop. Thanks so much! Read more.
Supplies
Paper: Neenah Solar White #110; Hammermill Color Copy Digital Cover 100#; Bazzill Cardstock in Date Swirl Stamps: Maggie with Penguin by Mo’s Digital Pencil; Christmas Sentiments by Penny Black Ink: Versafine in Onyx Black by Tsukineko Stencil: Holiday Knit Layering Stencil by Stampers Anonymous – Tim Holtz Embellishments: Dreamweaver Embossing Paste by Stampendous; Super Fine Detail Embossing Powder in Clear by Ranger Copics: E000, E00, E11, E21, E93, V20 (skin); BG70, BG72, BG75, BV25 (sweater); R22, R24, R35, R46, BV25 (hat, mittens & boots); BV25, C3, C5, V20 (penguin)
GOOD MORNING FRIENDS! Just a quick note to let you know that I will be offering my stencil techniques class one more time at Photo Scraps on Wednesday, August 21st from 1:00 PM to 3:00PM. If you missed this class earlier in the month, now is your last chance to get in on the fun! In this class, you will create seven stenciled backgrounds using various techniques and gel mediums that you can transform into lovely greeting cards with the addition of sentiments and die cuts from Honey Bee Stamps.
CLASS FEE $35 (includes stencil from Echo Park Paper Co. to add to your personal stash).
Photo Scraps 1213 Liberty Road | Eldersburg, MD 21784 phone: 410-549-5187 | web: http://photoscraps.blogspot.com Wednesday, August 21st from 1:00 PM to 3:00PM Please call Photo Scraps at 410-549-5187 to register.
NOTE: You will be able to assemble at least two cards in class. However, since gel mediums have varying dry times, you may need to complete the assembly of some of your cards at home.
BRING TO CLASS
You will need the following supplies for class. Please contact Photo Scraps in advance of class if you need any of the craft supplies on the list. If you wait until class time, you may not be able to purchase the supplies you’ll need to participate in class.
Distress Oxide ink pads in Worn Lipstick and Scattered Straw (you can substitute Squeezed Lemonade for Scattered Straw if necessary)
Versamark Ink Pad (either a regular sized pad or mini)
Three ink blenders (such as Ranger Ink Blending Tools, Nuvo Blending Sponges, Picket Fence Blending Brushes, etc.)
Paper trimmer
iCraft Purple Tape
Paper towels
Baby wipes
Scissors
Foam Squares (such as Gina K. Designs Foam Squares or Scrapbook Adhesives 3-D Squares)
Tape runner
Liquid glue that dries clear (such as Connect Glue by Gina K. Designs or Ranger Multi Medium Matte)